Your field sprayer is likely
finished its duties for this year. Any problems experienced with your
sprayer this past season should be fresh in your mind.
 |
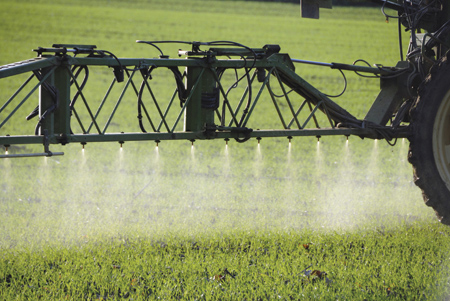
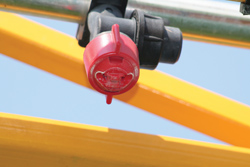
| Winterizing sprayers also involves removing and thoroughly cleaning out the end plugs or end caps on the various boom sections. All product residues can be removed by rinsing with sufficient cleaning solution. |
Your field sprayer is likely finished its duties for this year. Any problems experienced with your sprayer this past season should be fresh in your mind. Now is the time to check it over completely and order replacement parts allowing your dealer adequate time to get the needed items.
Cleaning, checking and winterizing your sprayer in the fall prepares it for storage and has it almost field ready in the spring. Having your sprayer in top working condition now will save you valuable time in the spring.
Clean the sprayer inside and out
Cleaning a sprayer both inside and out not only gets rid of accumulated dirt and grime but more importantly, removes as much of the chemical residue from the system as possible.
• Use a pressure washer and detergent to thoroughly wash the outside of the whole sprayer. Be sure to get all the tank surfaces, the boom, tires and rims as well as the frame and the undercarriage.
• Clean the inside of your spray tank completely using a good tank cleaner.
• Circulate this cleaning solution for 10 minutes through the tank wash
nozzle(s), if your sprayer is so equipped.
• Look for any leaks in the plumbing system as you are circulating the
cleaning solution through the sprayer. Be sure to repair any leaks before the sprayer is parked for the winter.
• Remove and thoroughly cleanout the end plugs or end caps on the various boom sections. Rinse with sufficient cleaning solution to remove all product residues.
• Remove all filters, screens, nozzles and diaphragm check valves and wash them in the same cleaning solution. A nozzle tip brush will aid in removing any buildup of material on screens.
• Reinstall all the filters, screens, nozzles and diaphragm check valves.
 |
| With the fall season fast approaching, field sprayers are likely finished their duties for this year. Now is the time to check them over completely. Cleaning, checking and winterizing sprayers in the fall prepares them for storage and allows them to be almost field ready in the spring. Having a sprayer in top working condition now will save valuable time in the spring. |
 |
| When preparing a sprayer for storage, remove all filters, screens, nozzles and diaphragm check valves and wash them in a cleaning solution. A nozzle tip brush will aid in removing any buildup of material on screens. Once they are clean, reinstall all the filters, screens, nozzles and diaphragm check valves. |
Plumbing freeze protection
All plumbing components are at risk of severe damage caused by water freezing. This is especially critical for the sprayer pump since it is the most expensive part of the plumbing system. Pumps that are
not freeze-protected not only risk frost damage but they can also deteriorate in storage as a result of corrosion.
A 50/50 mixture of a good quality antifreeze and water will protect against frost damage. This antifreeze mixture in the plumbing system will also prevent oxidation from occurring by not allowing air to contact metal surfaces causing rust.
• Mix up five gallons of antifreeze an water and pump it through all circuits of your sprayer, especially the agitator circuit. After 10 minutes of circulation through the various plumbing circuits, spray the mixture out through the boom and nozzles
• You can now shut off your sprayer.
• Remove the boom end caps or plugs and allow the liquid to drain out.
• Replace the boom end caps or plugs.
Foam markers
Completely drain the foam marker tank and the solution lines that go out to the boom ends. Use compressed air to blow out any remaining liquid in the foam marker lines. Clean or replace the particle filter in the bottom of the foam solution tank. Now you can fold the booms and put them into the cradles.
Lube and bolt check
Once the sprayer is dry, go over the whole sprayer from one end to the other looking for any signs of structural wear. This might show up as signs of movement of frame members or fatigue cracks.
• Any cracks in the frame components or wheel spindles should be repaired immediately.
• Touchup any areas of bare metal to protect against rust.
• Tighten all loose nuts and bolts to recommended torques on structural members.
• Inspect tires for cuts, embedded foreign objects and general tread
condition.
• Torque wheel studs to recommended levels.
• Check wheel bearings for adequate grease; repack with grease if
necessary.
• Grease and lubricate the whole sprayer as outlined in the operator’s
manual.
Electronics
Monitors and rate controller consoles are usually mounted inside a tractor cab. These units should be carefully removed and cleaned of any dirt accumulation. Store these units in a cool dry place preferably under cover. Coil the electronics cable that is attached to the sprayer. Use a soft bristle brush to remove any dirt in the cable connector blocks. Apply a thin film of electrical grease on the connector pins to prevent oxidation, which may cause poor contract. Fasten this coiled cable to a structural support of the sprayer to keep it from falling to the ground.
Make a big tag to hang on your sprayer that reads “Winterized.”
Store your sprayer in a clean dry building.
Helmut Spieser is an engineer (pesticide application and grain storage) with the Ontario Ministry of Agriculture, Food and Rural Affairs (OMAFRA)
Print this page